ghost.js 에서 astro 기반으로 블로그 옮긴 후기

개요
어제 올린 포스트 에 이어서 어떤 식으로 작업을 했는지 정리해보고자 한다.
작업순서
아래의 순서로 작업했다.
- astro 프로젝트 만들기
- json으로 export된 post를 md 파일로 생성
- 기존 포스트 내에 이미지를 긁어오기
astro 프로젝트 만들기
yarn astro create 명령어로 시작했으며, 기본 템플릿 중에 Blog가 있어 이걸로 시작했다.
Blog 템플릿의 경우 md, mdx를 긁어와서 페이지로 만들어주는 코드가 생성되어 있어서 편하게 작업할 수 있었다.
대충 이런 코드다.
---

const posts = (await Astro.glob('./*.{md,mdx}')).sort(
(a, b) => new Date(b.frontmatter.pubDate).valueOf() - new Date(a.frontmatter.pubDate).valueOf()
);

---

....

<ul>
  {posts.map(post => (
    <li>
      <time datetime={post.frontmatter.pubDate}>
        {new Date(post.frontmatter.pubDate).toLocaleDateString('ko', {
          year: 'numeric',
          month: 'short',
          day: 'numeric',
        })}
      </time>
      <a href={post.url}>{post.frontmatter.title}</a>
    </li>
  ))}
</ul>
....
이제 기존 포스팅을 md 파일로 변환하자.
기존 포스팅 가져오기
ghost.js에는 export 기능이 있어서, 지금까지 작성한 포스트를 JSON으로 다운 받을 수 있다.
ghost.js 2.x 기준으로 데이터의 형태는 아래처럼 생겼다.
{
  "db": [
    {
      "meta": {...}
      "data": {
        ...
        "posts": [
          {
            "id": "...",
            "uuid": "...",
            "title": "..",
            "slug": "...",
            "html": "...",
            "plaintext": "..",
            "feature_image": "...",
            "custom_excerpt": "...",
            "status": "...",
          }
        ]
      }
    }
  ]
}
db 안에 데이터가 배열 형태로 들어있던데, author 마다 따로 만들어지나 싶었다.
내 블로그는 작성자가 나 하나라서 그냥 db[0] 이렇게 가져와서 썼다.
json을 md 파일로 만들기
이제 위의 json을 https://docs.astro.build/kr/guides/markdown-content/를 참고하여 astro에서 지원하는 형태의 md 파일로 바꾸는 스크립트를 작성한다.
---

layout: '../layouts/BlogPost.astro'
title: '블로그 타이틀. post에서 title에 대응'
pubDate: '발행일자. post에서 published_at를 이용해 만들기'
description: 'post의 custom_excerpt 값이 있으면 그걸 쓰고, 없으면 plaintext 첫 줄만 넣는다.'
heroImage: 'post의 feature_image가 있는 경우 해당 이미지를 넣는다. 없으면 생략'

---

여기에 post의 html을 그대로 넣는다.
published인 post만 사용하기
post중 status가 published인 것만 우선 필터해둔다.
const publishedPosts = posts.filter(post => post.status === 'published')meta 데이터 처리 및 md 파일 생성
md 파일은 아래 코드로 생성했다.
;(async () => {
  await Promise.all(publishedPosts.map(async post => {
    const pubDate = dayjs(post.published_at).format('MMM D YYYY')

    let meta = {
      layout: "../layouts/BlogPost.astro",
      title: post.title,
      pubDate
    }


    if (post.feature_image) {
      meta.heroImage = post.feature_image
    }
    meta.description = post.custom_excerpt || post.plaintext.split('\n')[0]

    await writeFile(`../astro-blog/src/pages/${post.slug}.md`,
`---
${Object.keys(meta).map(key => `${key}: "${meta[key]}"`).join('\n')}
---

${post.html}
  `)
}))
포스트 내 이미지 찾기
다음으로 블로그 포스트 내에 있는 이미지들을 가져와서 넣는 작업이다.
정규표현식을 이용해서 이미지 src를 뽑은다음 긁어올까 했으나, jsdom을 이용하기로 했다.
// post 본문 내 img 태그 검출
const dom = new JSDOM(post.html)
const imageUrls = Array.from(dom.window.document.querySelectorAll('img')).map($img => $img.getAttribute('src'))

if (!isNil(meta.heroImage)) {
  imageUrls.push(meta.heroImage)
}

console.log(`${post.slug} has ${imageUrls.length} images.`)
이렇게 하면 손쉽게 img src를 모두 뽑아올 수 있다.
뽑아온 이미지 긁어오기
이미지는 axios로 긁어와서 저장했다.
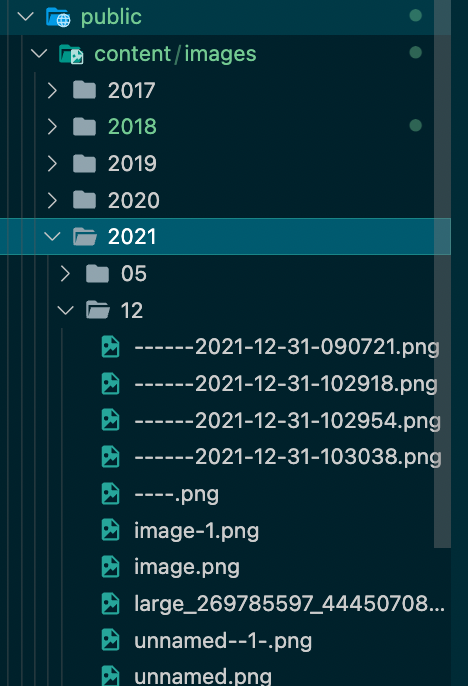
기존 블로그 포스트 내 이미지 경로가 /content/.... 형식으로 되어있어서, 해당 경로 그대로 디렉토리 구조를 생성하고 그 위치에 이미지를 불러오게 했다.
그후 content 폴더가 astro의 public 폴더에 위치한다면, 포스트 내 이미지 경로를 수정할 필요 없이 잘 불러올 것이다.
await Promise.all(
  imageUrls.map(async imageUrl => {
    const url = `https://blog.roto.codes/${imageUrl}`

    const writer = createWriteStream(`../astro-blog/public${imageUrl}`)

    // 폴더 만들어두기
    const paths = imageUrl.split('/')
    paths.pop()

    const imageDirectory = `../astro-blog/public/${paths.filter(path => path).join('/')}`

    mkdirSync(imageDirectory, {
      recursive: true,
    })
    const response = await axios({
      url,
      method: 'GET',
      responseType: 'stream',
    })

    response.data.pipe(writer)

    return new Promise((resolve, reject) => {
      writer.on('finish', resolve)
      writer.on('error', reject)
    })
  })
)
이렇게 이미지도 잘 긁어왔다.
전체 코드
혹시나 ghost.js 에서 astro로 마이그레이션 할 사람이 있을까봐 코드를 여기에 올려둔다. 어짜히 한 번 쓰고 말 스크립트라서 코드 분리나 그런 거 생각 안 하고 대충 짰으니 정말로 사용할 경우에는 적당히 가공해서 사용하시면 될 것이다.
const data = require('./data.json')
const dayjs = require('dayjs')
const { isNil } = require('lodash')
const jsdom = require('jsdom')
const { JSDOM } = jsdom
const { createWriteStream, mkdirSync } = require('fs')
const { writeFile } = require('fs').promises
const axios = require('axios')

const { posts } = data.db[0].data
const publishedPosts = posts.filter(post => post.status === 'published')

;(async () => {
  await Promise.all(
    publishedPosts.map(async post => {
      const pubDate = dayjs(post.published_at).format('MMM D YYYY')

      let meta = {
        layout: '../layouts/BlogPost.astro',
        title: post.title,
        pubDate,
      }

      if (post.feature_image) {
        meta.heroImage = post.feature_image
      }
      meta.description = post.custom_excerpt || post.plaintext.split('\n')[0]

      await writeFile(
        `../astro-blog/src/pages/${post.slug}.md`,
        `---
${Object.keys(meta)
  .map(key => `${key}: "${meta[key]}"`)
  .join('\n')}
---

${post.html}
`
      )

      // post 본문 내 img 태그 검출
      const dom = new JSDOM(post.html)
      const imageUrls = Array.from(dom.window.document.querySelectorAll('img')).map($img => $img.getAttribute('src'))

      if (!isNil(meta.heroImage)) {
        imageUrls.push(meta.heroImage)
      }

      console.log(`${post.slug} has ${imageUrls.length} images.`)
      await Promise.all(
        imageUrls.map(async imageUrl => {
          const url = `https://blog.roto.codes/${imageUrl}`

          const writer = createWriteStream(`../astro-blog/public${imageUrl}`)

          // 폴더 만들어두기
          const paths = imageUrl.split('/')
          paths.pop()

          const imageDirectory = `../astro-blog/public/${paths.filter(path => path).join('/')}`

          mkdirSync(imageDirectory, {
            recursive: true,
          })
          const response = await axios({
            url,
            method: 'GET',
            responseType: 'stream',
          })

          response.data.pipe(writer)

          return new Promise((resolve, reject) => {
            writer.on('finish', resolve)
            writer.on('error', reject)
          })
        })
      )

      console.log(`${post.slug} converted.`)
    })
  )
})()
후기
일단 이런 류의 도구는 여러번 써본 덕분에 astro의 기본적인 내용들은 어렵지 않게 익힐 수 있었다. 블로그 같은 경우는 렌더링 해야하는 컨텐츠 양이 복잡하지도 않고 양 조차도 적어서 어렵지 않게 만들 수 있었다.
밴드 홈페이지의 경우 next.js로 시작했다 gatsby를 거쳐 현재는 remix로 되어있는데, 이것 역시 astro로 포팅해보면 좀 더 느낌이 올 것 같다.
잡설
과거에는 Front-end, Back-end라는 구분이 없이 Web Engineer가 서버 템플릿 기반으로 마크업을 생성하고 그 위에서 JavaScript를 돌리는 구조였다가, 해당 구조에서 뷰 로직을 비롯해 Client에 관련된 부분을 완전히 분리하는 것이 최근까지의 추세였다고 생각한다. 이때는 클라이언트 언어와 서버 언어가 서로 다른 언어인 경우가 대부분이었고, 이것이 한 곳에 뒤섞여 있는 부분이 높은 복잡도와 높은 고통을 주었기 때문에 아예 양쪽의 책임을 명확히 분리해서 작업하는 방향으로 진행이 계속 되지 않았나 싶다.
최근에는 node.js를 비롯해서 JavaScript 기반으로 서버쪽 코드를 작업하는 것이 굉장히 발전한 덕분에 클라이언트의 일부 복잡도를 다시 서버로 옮기려는 듯한 흐름이 보인다. 그래서 CSR로 하는 것으로 하던 부분들을 다시 SSR로 하려고 하는 흐름들이 있었을 것이다.
어떻게 보면 SSR의 경우 과거엔 매우 당연했던 부분이고, 여기서 파생되는 SSG, ISR 등의 개념 역시 과거 서버 템플릿 기반으로 화면 작업을 했던 사람들에게는 크게 어렵지 않은 부분들일 것이다. 문제는 위의 경험이 없는 사람들의 경우인데… 농담처럼 하는 이야기가 PHP(혹은 JSP..혹은 node.js)로 JavaScript 코드 없이 form based로 간단한 게시판 한 번 짜보면 이해 될 거라고 하는 편이다. 아마 그 체험 한 번 해보면 SSR에 대해선 쉽게 이해할 수 있을 듯.
여태까지 그러긴 했지만 앞으로는 Front-end Engineer라고 HTML, CSS, JS만 보려고 하면 더욱 더 안 될 것 같고, Web Server(+infra)와 관련된 부분에서는 Front-end와 Back-end가 교집합 형태로 존재하게 될 것 같다는 생각이 든다.
